TensorFlowでスタイル変換して遊んだ【2022】

TIP
keras.ioのgithubリポジトリのサンプルに有名なスタイル変換のプログラムがあったので、遊んでみた。フルスクラッチっぽいので、かなり勉強になる。
若干の解説とともにコードを紹介していく。
WARNING
目次
ちなみに私はGoogle Colabは使用せず、RTX-3090のオンプレ機にssh接続してjupyter notebookを使用している。
私の環境
- GPU:RTX-3090のBTOパソコン
- pyenvでインストールしたpython=3.7.11
- jupyter notebook
スタイル変換やってみよう
ライブラリのインポート
おなじみのpythonライブラリのインポートの部分。このプログラムでは、VGGを利用するようである。トレーニングの進度がわからないため、今回はtqdmをインポートして進度を視覚化している。
ほら、不安になるじゃん。止まってるんじゃないかってさ。
# ライブラリのインポート
from tqdm import tqdm
import numpy as np
import tensorflow as tf
from tensorflow import keras
from tensorflow.keras.applications import vgg19
画像の取り込み
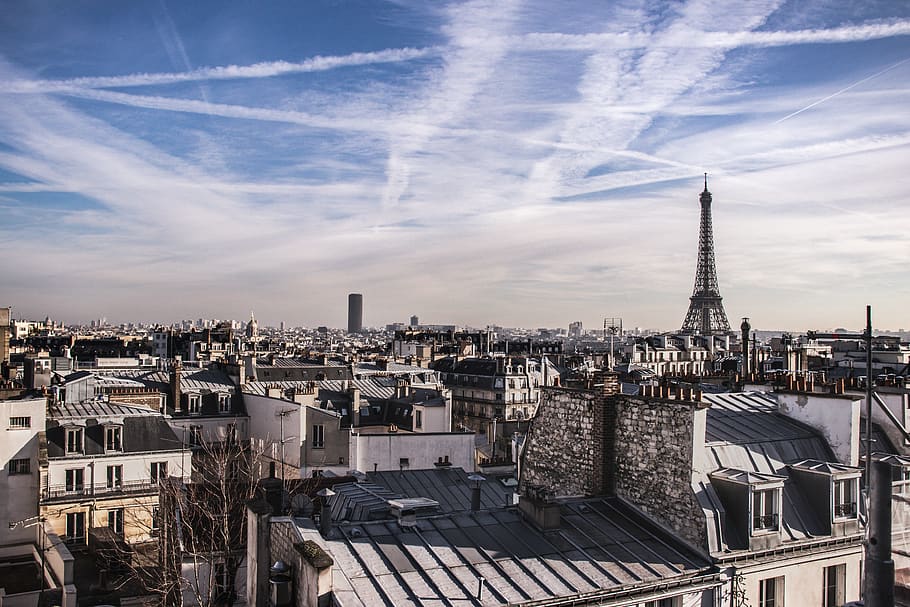
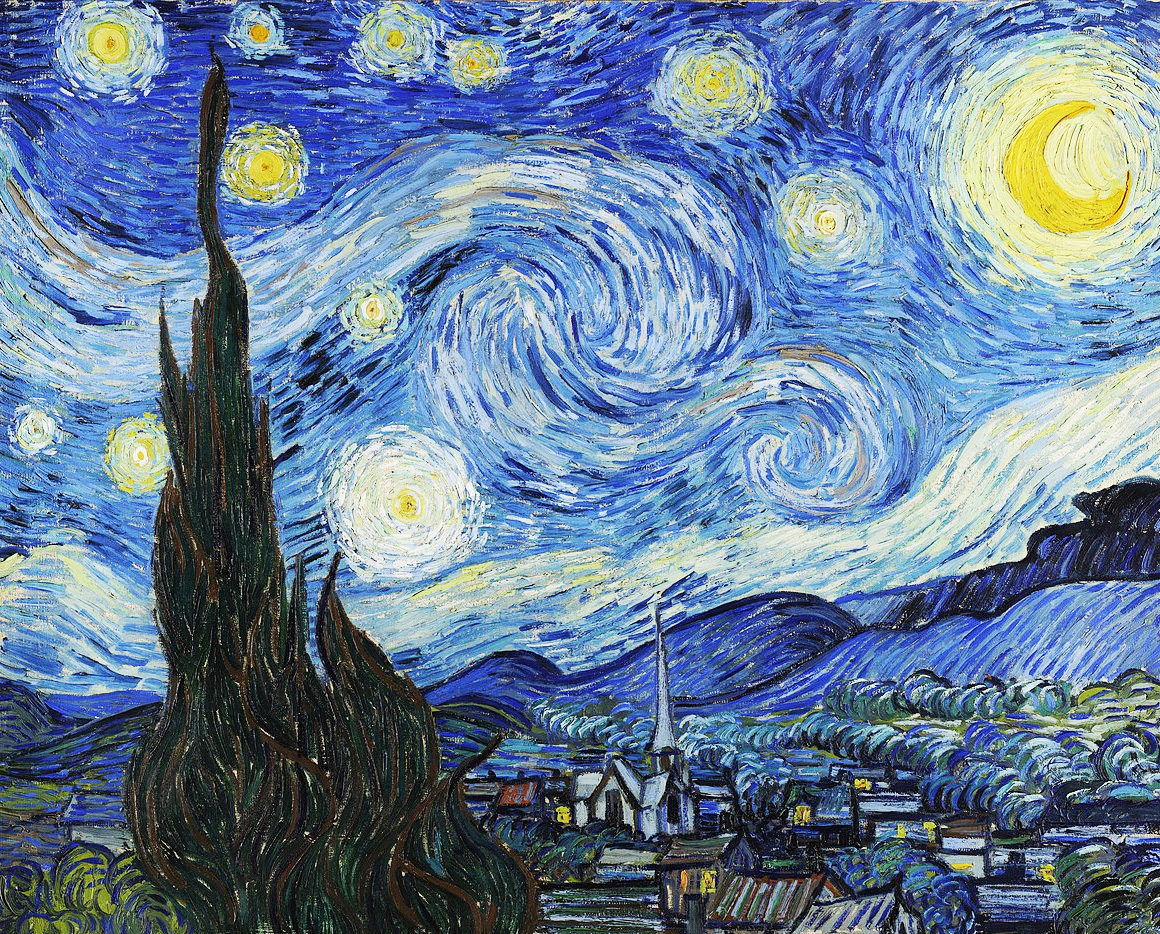
kerasのutilで写真を使うことができる。ぜひ活用しよう。 今回はトレーニングにkeras提供の画像を使い、推論段階では自分の撮った写真にも適用してみた。
base_image_path = keras.utils.get_file("paris.jpg", "https://i.imgur.com/F28w3Ac.jpg")
style_reference_image_path = keras.utils.get_file(
    "starry_night.jpg", "https://i.imgur.com/9ooB60I.jpg"
)
result_prefix = "paris_generated"

# 異なる三つの重みを設定
total_variation_weight = 1e-6
style_weight = 1e-6
content_weight = 2.5e-8

# 生成した画像の次元(サイズ)を設定
width, height = keras.preprocessing.image.load_img(base_image_path).size
img_nrows = 400
img_ncols = int(width * img_nrows / height)
画像の確認
IPythonのdisplay()でjupyter notebookに表示した。
# ベース(コンテンツ)画像とスタイル参照画像を見てみる

from IPython.display import Image, display

display(Image(base_image_path))
display(Image(style_reference_image_path))
画像処理の関数定義
画像をTensorFlowで計算可能なtensorに変換するための関数と、tensorから画像に戻す関数を定義する。いわば前処理と後処理のための関数である。
# 画像処理のふたつの関数を定義
# 画像の前処理(画像→テンソル)
def preprocess_image(image_path):
    # 画像を開いてサイズを変更し、適切なテンソルにフォーマットするためのUtil関数
    img = keras.preprocessing.image.load_img(
        image_path, target_size=(img_nrows, img_ncols)
    )
    img = keras.preprocessing.image.img_to_array(img)
    img = np.expand_dims(img, axis=0)
    img = vgg19.preprocess_input(img)
    return tf.convert_to_tensor(img)

# テンソルの後処理(テンソル→画像)
def deprocess_image(x):
    # テンソルを有効な画像に変換するためのUtil関数
    x = x.reshape((img_nrows, img_ncols, 3))
    # Remove zero-center by mean pixel
    x[:, :, 0] += 103.939
    x[:, :, 1] += 116.779
    x[:, :, 2] += 123.68
    # 'BGR'->'RGB'
    x = x[:, :, ::-1]
    x = np.clip(x, 0, 255).astype("uint8")
    return x
損失関数の定義
まず四つのutility functionを定義する。
| 関数 | 説明 |
|---|---|
| グラム行列 | その層のすべての可能な特徴のペアの間のない席を格納した行列 (スタイル損失の計算に使う) |
| スタイル損失 | 生成された画像をスタイル参照画像のローカルテクスチャに近づける。 |
| コンテンツ損失 | 画像のテーマとその内容の全体的な配置との観点からふたつのがぞうが どれだけ異なっているかを計測する。 |
| 全変動損失 | 統合画像内のノイズを計測する。 |
# グラム行列の定義
def gram_matrix(x):
    x = tf.transpose(x, (2, 0, 1))
    features = tf.reshape(x, (tf.shape(x)[0], -1))
    gram = tf.matmul(features, tf.transpose(features))
    return gram

# スタイル損失は、生成画像において参照画像のスタイルを維持するためのものである。
# グラム行列(スタイルを表す)に基づくものである特徴マップを生成する。

# スタイル損失の定義
def style_loss(style, combination):
    S = gram_matrix(style)
    C = gram_matrix(combination)
    channels = 3
    size = img_nrows * img_ncols
    return tf.reduce_sum(tf.square(S - C)) / (4.0 * (channels**2) * (size**2))

# An auxiliary loss function
# designed to maintain the "content" of the
# base image in the generated image

# コンテンツ損失の定義
def content_loss(base, combination):
    return tf.reduce_sum(tf.square(combination - base))


# The 3rd loss function, total variation loss,
# designed to keep the generated image locally coherent

# 全変動損失
def total_variation_loss(x):
    a = tf.square(
        x[:, : img_nrows - 1, : img_ncols - 1, :] - x[:, 1:, : img_ncols - 1, :]
    )
    b = tf.square(
        x[:, : img_nrows - 1, : img_ncols - 1, :] - x[:, : img_nrows - 1, 1:, :]
    )
    return tf.reduce_sum(tf.pow(a + b, 1.25))
特徴抽出モデルの作成
次に、中間活性度を取得する特徴抽出モデルを作成する。VGG19を(dictとして、名前で)指定する。重みはimagenetから拝借しているようである。
# Build a VGG19 model loaded with pre-trained ImageNet weights
model = vgg19.VGG19(weights="imagenet", include_top=False)

# Get the symbolic outputs of each "key" layer (we gave them unique names).
outputs_dict = dict([(layer.name, layer.output) for layer in model.layers])

# vgg16の各レイヤーの活性化値を返すモデルを設定する。
feature_extractor = keras.Model(inputs=model.inputs, outputs=outputs_dict)
スタイル変換損失
レイヤーネームの設定。
# List of layers to use for the style loss.
style_layer_names = [
    "block1_conv1",
    "block2_conv1",
    "block3_conv1",
    "block4_conv1",
    "block5_conv1",
]
# The layer to use for the content loss.
content_layer_name = "block5_conv2"
最後にスタイル変換損失を計算する関数を定義する。
# 損失の計算関数
def compute_loss(combination_image, base_image, style_reference_image):
    input_tensor = tf.concat(
        [base_image, style_reference_image, combination_image], axis=0
    )
    features = feature_extractor(input_tensor)

    # Initialize the loss
    loss = tf.zeros(shape=())

    # Add content loss
    layer_features = features[content_layer_name]
    base_image_features = layer_features[0, :, :, :]
    combination_features = layer_features[2, :, :, :]
    loss = loss + content_weight * content_loss(
        base_image_features, combination_features
    )
    # Add style loss
    for layer_name in style_layer_names:
        layer_features = features[layer_name]
        style_reference_features = layer_features[1, :, :, :]
        combination_features = layer_features[2, :, :, :]
        sl = style_loss(style_reference_features, combination_features)
        loss += (style_weight / len(style_layer_names)) * sl

    # Add total variation loss
    loss += total_variation_weight * total_variation_loss(combination_image)
    return loss
tf.functionデコレーターを追加
損失と勾配の計算にtf.functionデコレーターを追加してある。これを導入することで計算が早く済むとのことであった。
@tf.function
def compute_loss_and_grads(combination_image, base_image, style_reference_image):
    with tf.GradientTape() as tape:
        loss = compute_loss(combination_image, base_image, style_reference_image)
    grads = tape.gradient(loss, combination_image)
    return loss, grads
トレーニング
ここから実際のトレーニングの実行へと入っていく。
勾配降下法を繰り返し実行し、損失を最小化し、保存する。100回の反復ごとに結果画像を保存するようになっている。
学習率については、100ステップごとに0.96ずつ減衰させている。
# 最適化関数の定義
optimizer = keras.optimizers.SGD(
    keras.optimizers.schedules.ExponentialDecay(
        initial_learning_rate=100.0, decay_steps=100, decay_rate=0.96
    )
)

base_image = preprocess_image(base_image_path)
style_reference_image = preprocess_image(style_reference_image_path)
combination_image = tf.Variable(preprocess_image(base_image_path))

iterations = 4000

# トレーニング実行
for i in tqdm(range(1, iterations + 1)):
    loss, grads = compute_loss_and_grads(
        combination_image, base_image, style_reference_image
    )
    optimizer.apply_gradients([(grads, combination_image)])
    if i % 100 == 0:
        print("Iteration %d: loss=%.2f" % (i, loss))
        img = deprocess_image(combination_image.numpy())
        fname = result_prefix + "_at_iteration_%d.png" % i
        keras.preprocessing.image.save_img(fname, img)
  2%|▎         | 100/4000 [05:08<3:21:57,  3.11s/it]

Iteration 100: loss=11018.48


  5%|▌         | 200/4000 [10:18<3:16:54,  3.11s/it]

Iteration 200: loss=8514.58


  8%|▊         | 300/4000 [15:28<3:11:33,  3.11s/it]

Iteration 300: loss=7572.32


 10%|█         | 400/4000 [20:37<3:06:47,  3.11s/it]

Iteration 400: loss=7064.62


 12%|█▎        | 500/4000 [25:47<3:01:42,  3.12s/it]

Iteration 500: loss=6736.56


 15%|█▌        | 600/4000 [30:57<2:56:13,  3.11s/it]

Iteration 600: loss=6502.00


 18%|█▊        | 700/4000 [36:07<2:51:05,  3.11s/it]

Iteration 700: loss=6323.66


 20%|██        | 800/4000 [41:17<2:45:37,  3.11s/it]

Iteration 800: loss=6181.72


 22%|██▎       | 900/4000 [46:27<2:40:19,  3.10s/it]

Iteration 900: loss=6065.37


 25%|██▌       | 1000/4000 [51:37<2:35:33,  3.11s/it]

Iteration 1000: loss=5967.58


 28%|██▊       | 1100/4000 [56:47<2:30:20,  3.11s/it]

Iteration 1100: loss=5884.27


 30%|███       | 1200/4000 [1:01:57<2:25:07,  3.11s/it]

Iteration 1200: loss=5812.43


 32%|███▎      | 1300/4000 [1:07:07<2:19:32,  3.10s/it]

Iteration 1300: loss=5750.09


 35%|███▌      | 1400/4000 [1:12:17<2:14:59,  3.12s/it]

Iteration 1400: loss=5695.42


 38%|███▊      | 1500/4000 [1:17:27<2:09:48,  3.12s/it]

Iteration 1500: loss=5647.06


 40%|████      | 1600/4000 [1:22:37<2:04:23,  3.11s/it]

Iteration 1600: loss=5604.01


 45%|████▌     | 1800/4000 [1:32:57<1:54:10,  3.11s/it]

Iteration 1800: loss=5530.53


 48%|████▊     | 1900/4000 [1:38:07<1:48:35,  3.10s/it]

Iteration 1900: loss=5498.97


 50%|█████     | 2000/4000 [1:43:17<1:43:30,  3.11s/it]

Iteration 2000: loss=5470.32


 52%|█████▎    | 2100/4000 [1:48:28<1:38:16,  3.10s/it]

Iteration 2100: loss=5444.23


 55%|█████▌    | 2200/4000 [1:53:38<1:33:42,  3.12s/it]

Iteration 2200: loss=5420.38


 57%|█████▊    | 2300/4000 [1:58:49<1:28:09,  3.11s/it]

Iteration 2300: loss=5398.45


 60%|██████    | 2400/4000 [2:03:59<1:22:50,  3.11s/it]

Iteration 2400: loss=5378.28


 62%|██████▎   | 2500/4000 [2:09:09<1:17:45,  3.11s/it]

Iteration 2500: loss=5359.63


 65%|██████▌   | 2600/4000 [2:14:19<1:12:42,  3.12s/it]

Iteration 2600: loss=5342.41


 68%|██████▊   | 2700/4000 [2:19:30<1:07:24,  3.11s/it]

Iteration 2700: loss=5326.45


 70%|███████   | 2800/4000 [2:24:40<1:01:59,  3.10s/it]

Iteration 2800: loss=5311.59


 72%|███████▎  | 2900/4000 [2:29:49<57:06,  3.12s/it]

Iteration 2900: loss=5297.77


 75%|███████▌  | 3000/4000 [2:35:00<51:48,  3.11s/it]

Iteration 3000: loss=5284.89


 78%|███████▊  | 3100/4000 [2:40:10<46:39,  3.11s/it]

Iteration 3100: loss=5272.90


 80%|████████  | 3200/4000 [2:45:20<41:34,  3.12s/it]

Iteration 3200: loss=5261.71


 82%|████████▎ | 3300/4000 [2:50:30<36:20,  3.11s/it]

Iteration 3300: loss=5251.23


 85%|████████▌ | 3400/4000 [2:55:40<31:03,  3.11s/it]

Iteration 3400: loss=5241.42


 88%|████████▊ | 3500/4000 [3:00:50<25:55,  3.11s/it]

Iteration 3500: loss=5232.22


 90%|█████████ | 3600/4000 [3:06:00<20:44,  3.11s/it]

Iteration 3600: loss=5223.60


 92%|█████████▎| 3700/4000 [3:11:11<15:31,  3.10s/it]

Iteration 3700: loss=5215.50


 95%|█████████▌| 3800/4000 [3:16:21<10:21,  3.11s/it]

Iteration 3800: loss=5207.89


 98%|█████████▊| 3900/4000 [3:21:31<05:10,  3.11s/it]

Iteration 3900: loss=5200.74


100%|██████████| 4000/4000 [3:26:41<00:00,  3.10s/it]

Iteration 4000: loss=5193.98
変換結果の確認
4000イテレーション回した後の結果を表示する。
display(Image(result_prefix + "_at_iteration_4000.png"))

モデルを保存する
最後に、モデルを保存して、次に変換する際にトレーニングしなくて済むようにしておく。ここで注意すべきなのは、.h5形式で保存するとoptimizerの重みが更新されないので、スタイル変換がうまくいかないことである。普通にモデルの名前だけで保存すると.keras形式で保存され、モデルがフォルダとして作成されるので、この形式で保存することをおすすめする。
# h5形式で保存すると、optimizerの重みが更新されない
model.save('style-4000')
保存したモデルから推論する
重複する部分の説明は省略する。
# ライブラリのインポート
from tqdm import tqdm
import numpy as np
import tensorflow as tf
from tensorflow import keras
from tensorflow.keras.applications import vgg19

# モデル読み込み
model = tf.keras.models.load_model('style-4000')

# Get the symbolic outputs of each "key" layer (we gave them unique names).
outputs_dict = dict([(layer.name, layer.output) for layer in model.layers])

# vgg16の各レイヤーの活性化値を返すモデルを設定する。
feature_extractor = keras.Model(inputs=model.inputs, outputs=outputs_dict)

# 損失の計算関数
def compute_loss(combination_image, base_image, style_reference_image):
    input_tensor = tf.concat(
        [base_image, style_reference_image, combination_image], axis=0
    )
    features = feature_extractor(input_tensor)

    # Initialize the loss
    loss = tf.zeros(shape=())

    # Add content loss
    layer_features = features[content_layer_name]
    base_image_features = layer_features[0, :, :, :]
    combination_features = layer_features[2, :, :, :]
    loss = loss + content_weight * content_loss(
        base_image_features, combination_features
    )
    # Add style loss
    for layer_name in style_layer_names:
        layer_features = features[layer_name]
        style_reference_features = layer_features[1, :, :, :]
        combination_features = layer_features[2, :, :, :]
        sl = style_loss(style_reference_features, combination_features)
        loss += (style_weight / len(style_layer_names)) * sl

    # Add total variation loss
    loss += total_variation_weight * total_variation_loss(combination_image)
    return loss

@tf.function
def compute_loss_and_grads(combination_image, base_image, style_reference_image):
    with tf.GradientTape() as tape:
        loss = compute_loss(combination_image, base_image, style_reference_image)
    grads = tape.gradient(loss, combination_image)
    return loss, grads

base_image_path = 'style_test.jpg'
style_reference_image_path = keras.utils.get_file(
    "starry_night.jpg", "https://i.imgur.com/9ooB60I.jpg"
)
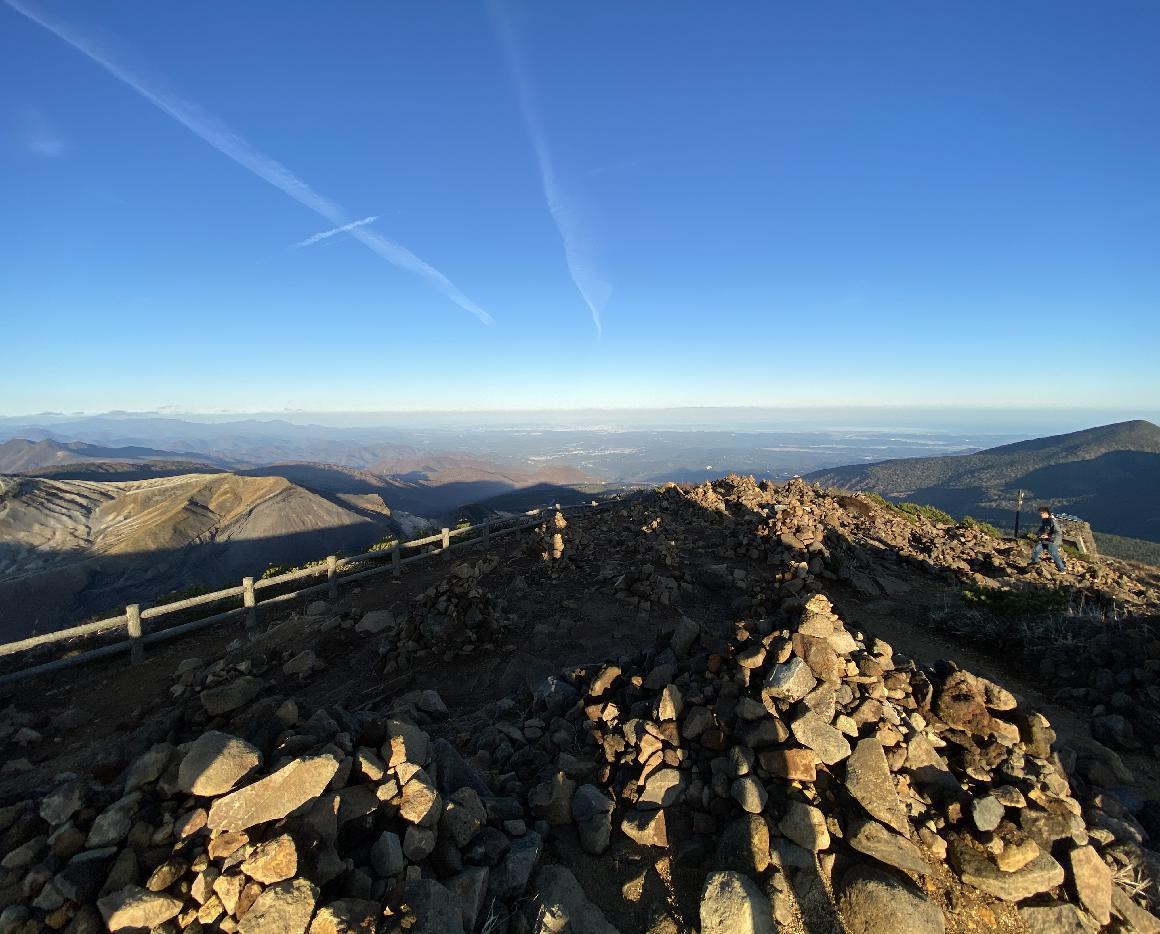
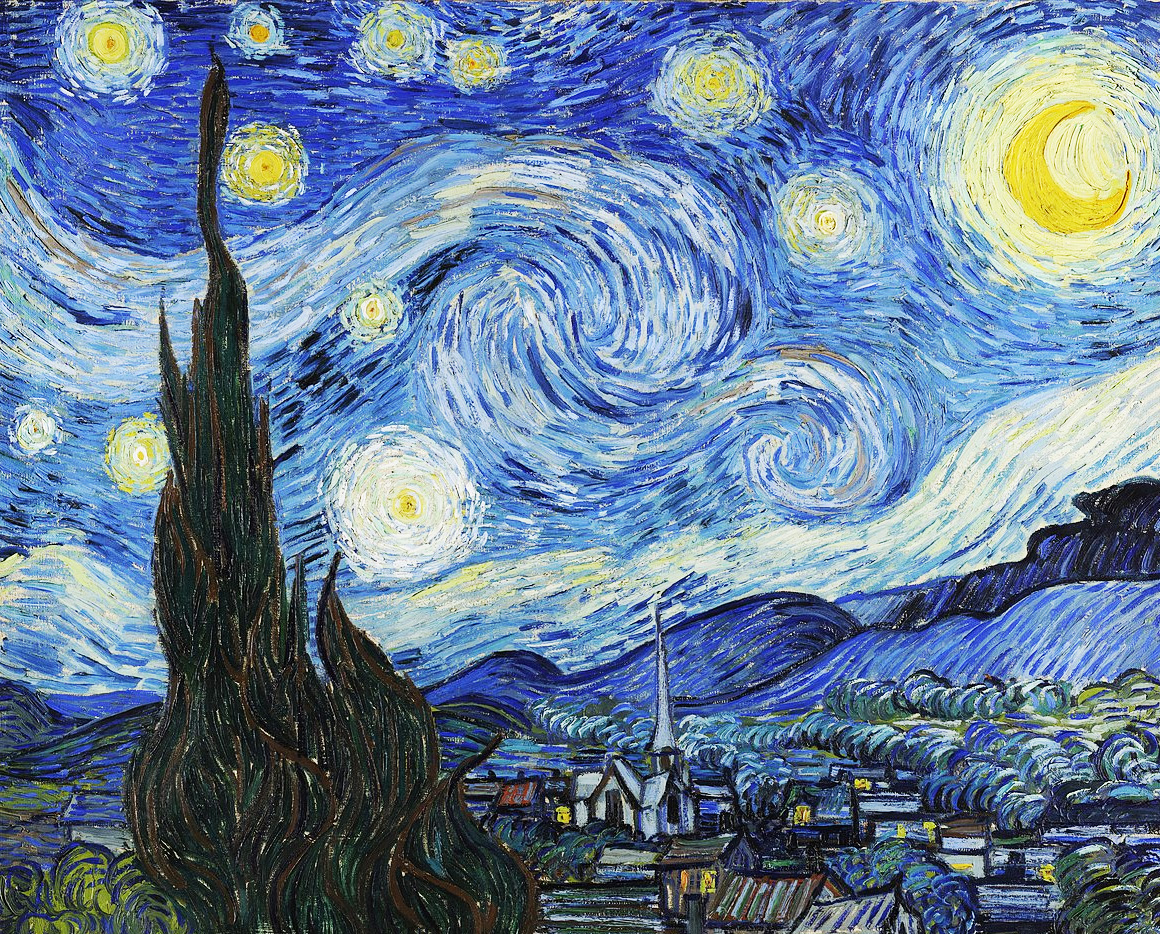
推論前の画像を並べて表示しておく。前に表示されているのが、私の撮った元画像だ。
from IPython.display import Image, display

display(Image(base_image_path))
display(Image(style_reference_image_path))
再び推論実行
loss, grads = compute_loss_and_grads(
    combination_image, base_image, style_reference_image
)
optimizer.apply_gradients([(grads, combination_image)])
img = deprocess_image(combination_image.numpy())
fname = "style-4000-1.png"
keras.preprocessing.image.save_img(fname, img)
結果確認
最後に、結果を見てみよう。
display(Image(fname))

最後に
ニューラルスタイル変換については学習済みのモデルをHUb等から呼び出して推論する方法が既にあるので、そちらを利用したほうが楽なのだが、ほぼフルスクラッチで実装されたサンプルプログラムを実行してみることで理解が深まったように思う。
特に、モデルを保存して再利用するところなどは初めてやったので、経験値として溜まっていたら幸いである。
今後の展開としては、せっかくここまでやったので、色々な画像にスタイル変換をかけてみたり、別の画像でスタイル学習を行なって変換させてみたりしてみたいと思っている。
さて、それでは今回はこのへんで。
